After downloading and installing the NCP Client App from the App Store to the iPad or iPhone, you can download the initial configuration as instructed by your administrator. (See Administrative steps before commissioning).
There are two options for importing the initial configuration that has not yet been personalized:
Importing the initial configuration via web browser or e-mail
and
Importing the initial configuration via iTunes
after that the
Download of the personal configuration
is to be carried out.
Importing the initial configuration via web browser (Safari) or e-mail
Touch the configuration file *.ncpsemconfig in the e-mail attachment or downloaded from a website and select the option “Open with NCP client” (see figures below) to import the initial configuration.

App and initial configuration with *.ncpconfigsem

Import with NCP Client
In the following screens, adding vpn configurations must be permitted and confirmed with a fingerprint or PIN entry.
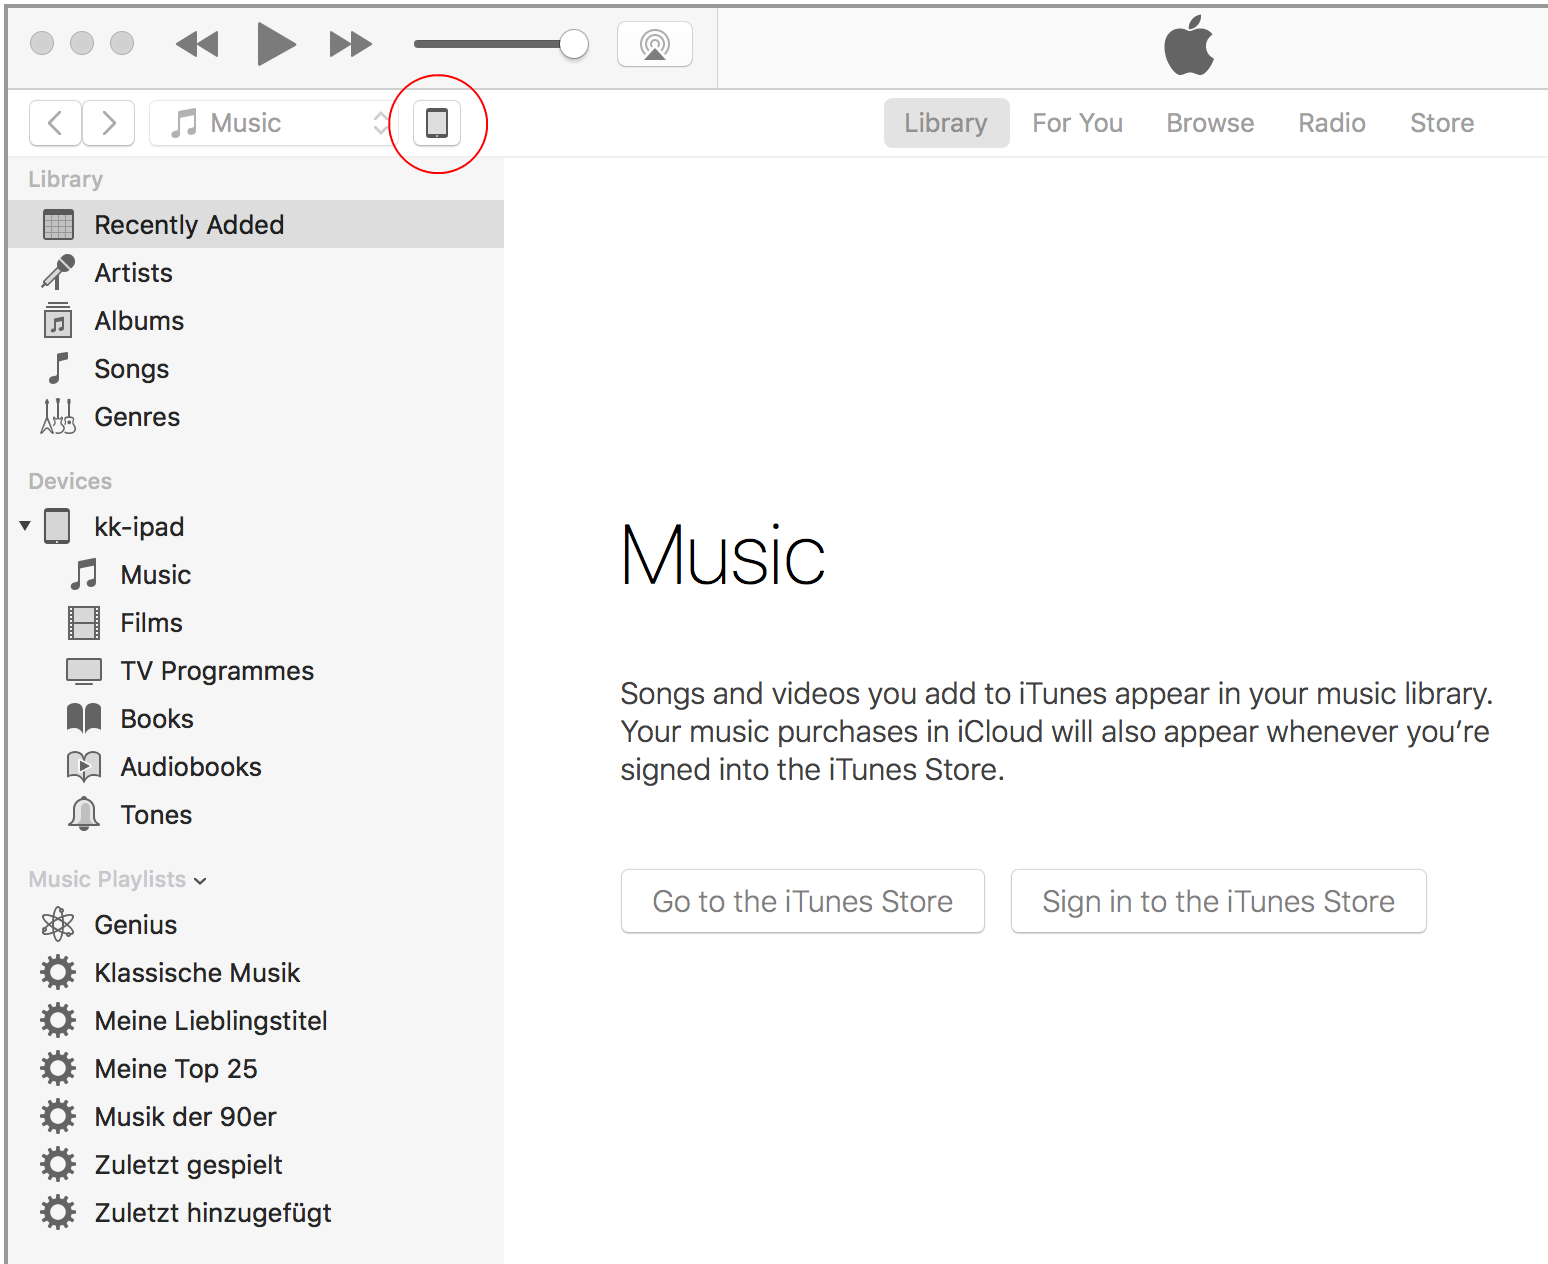
Importing the initial configuration via iTunes
Start iTunes on a PC or Mac and select the connected device (see figure below).
Select "Settings” under "Apps" and scroll to File Sharing (see figure below).
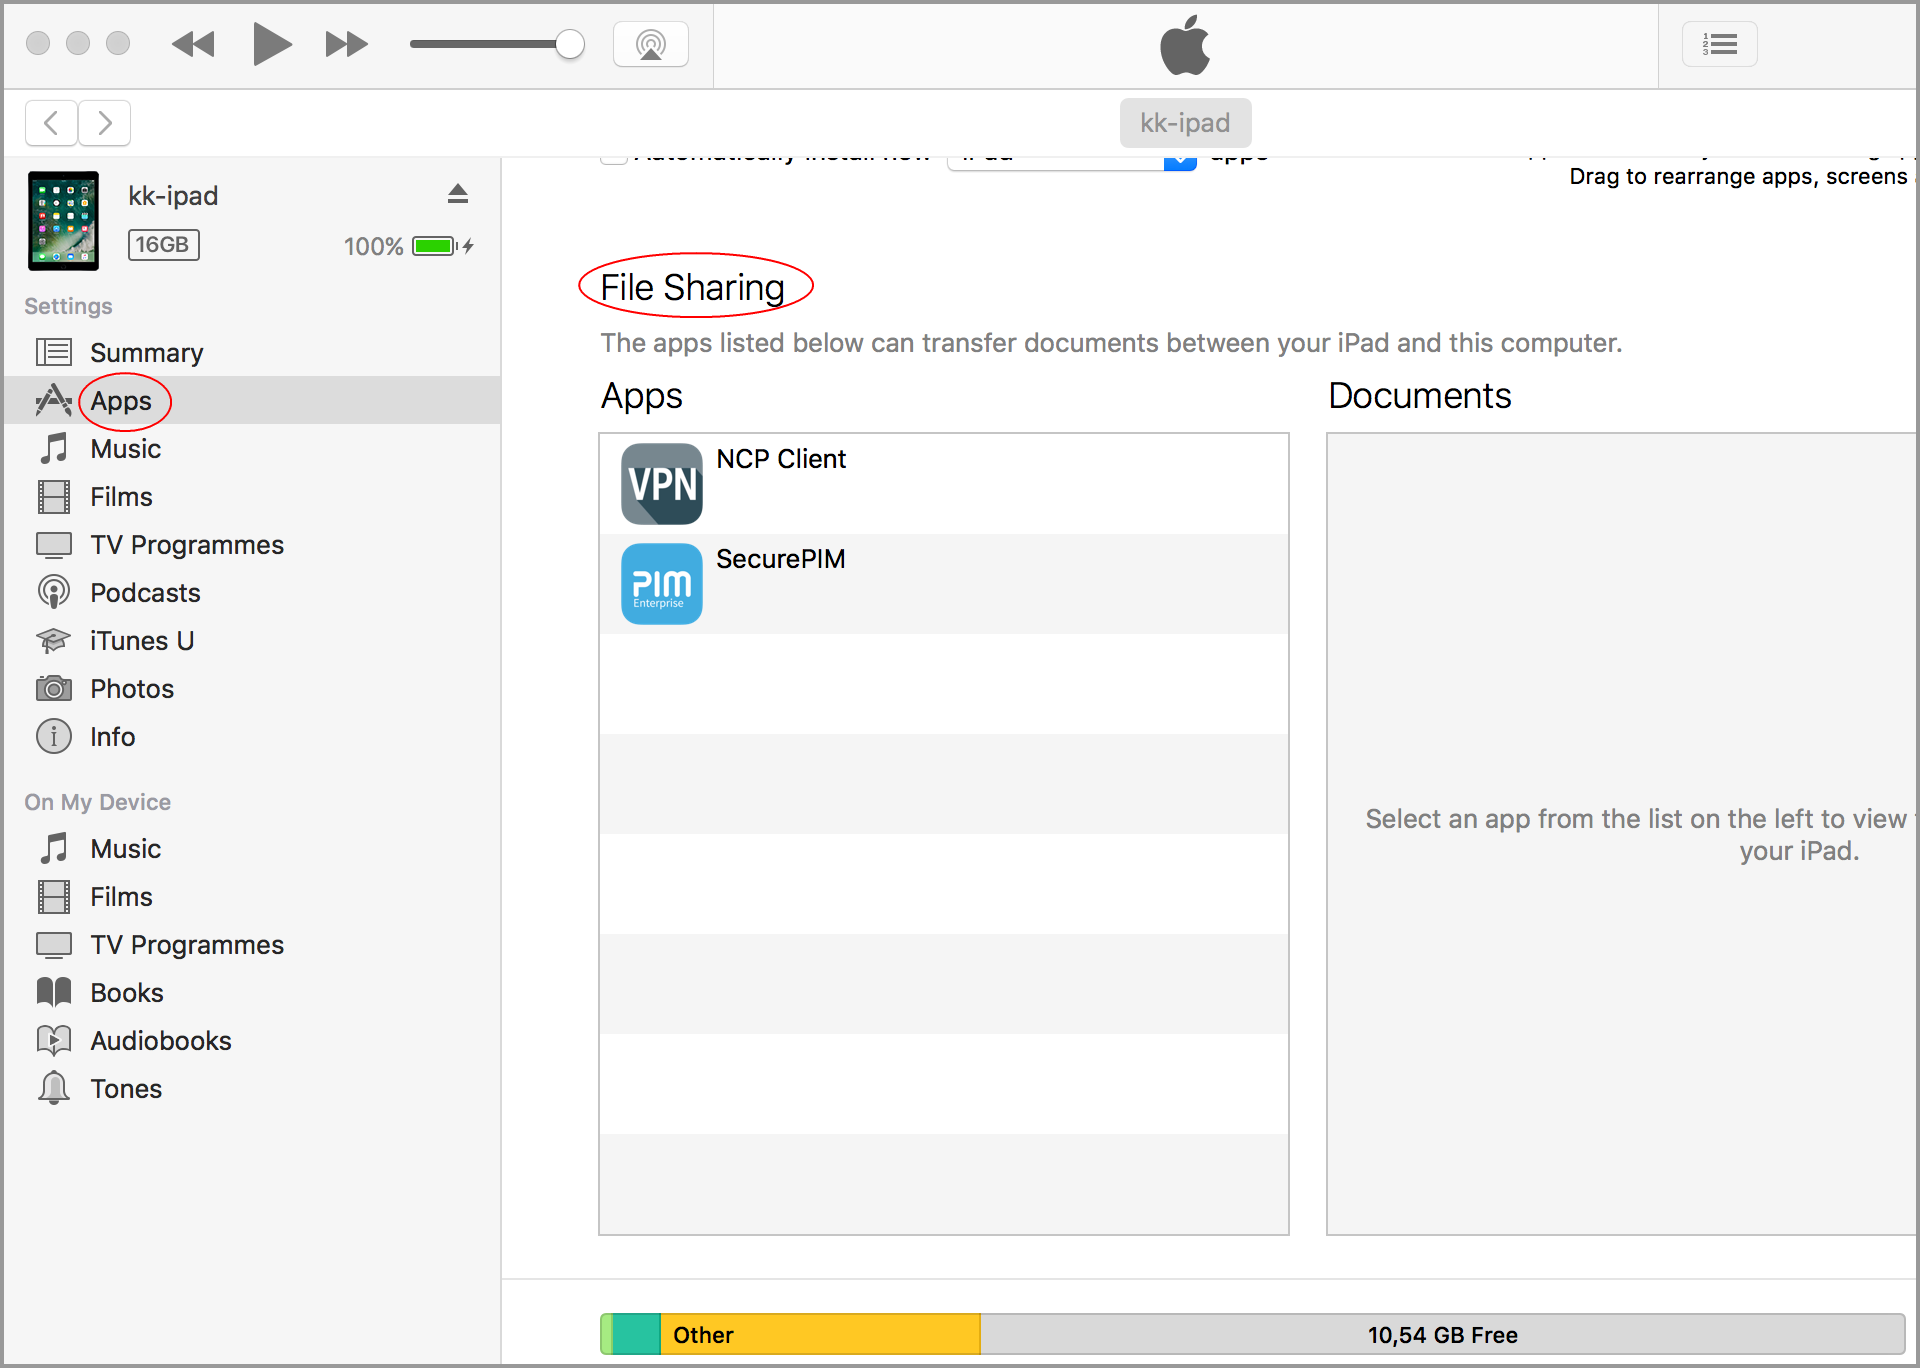
Select the NCP icon Click “Add” to show the initial configuration (*.ncpconfigsem) under “Documents from NCP Client”. If a configuration with a certificate is used, it must now also be added in the section "Documents from NCP Client".
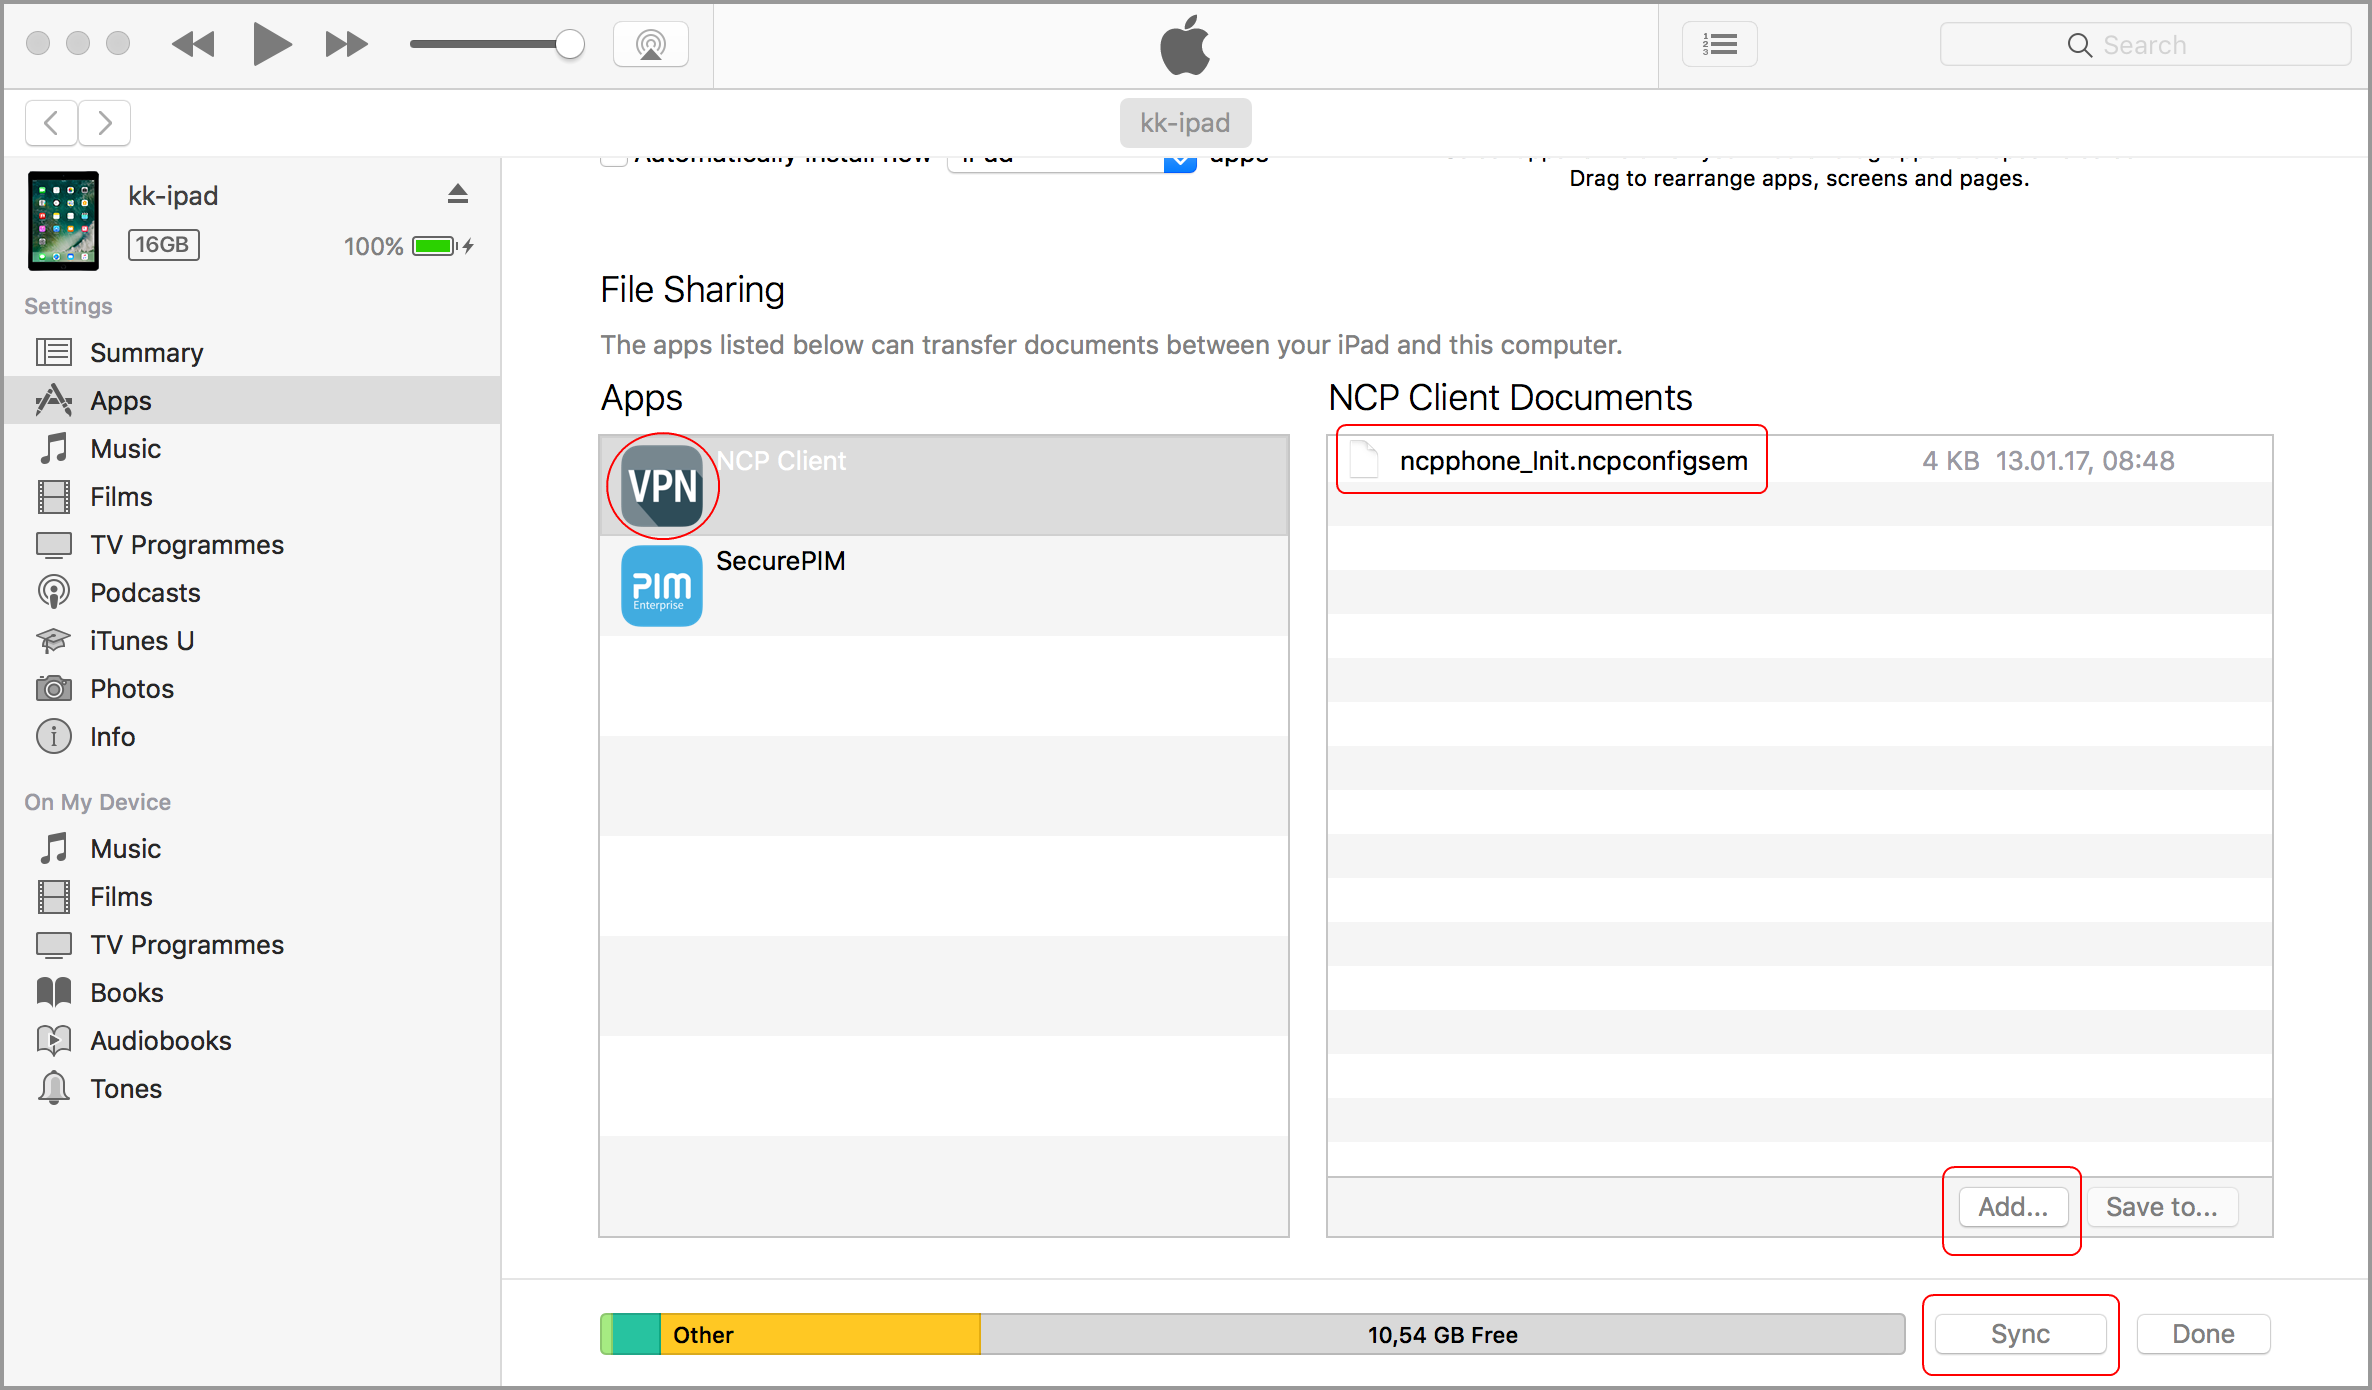
Click the “Synchronize” button to transfer all files from the document area to the device.
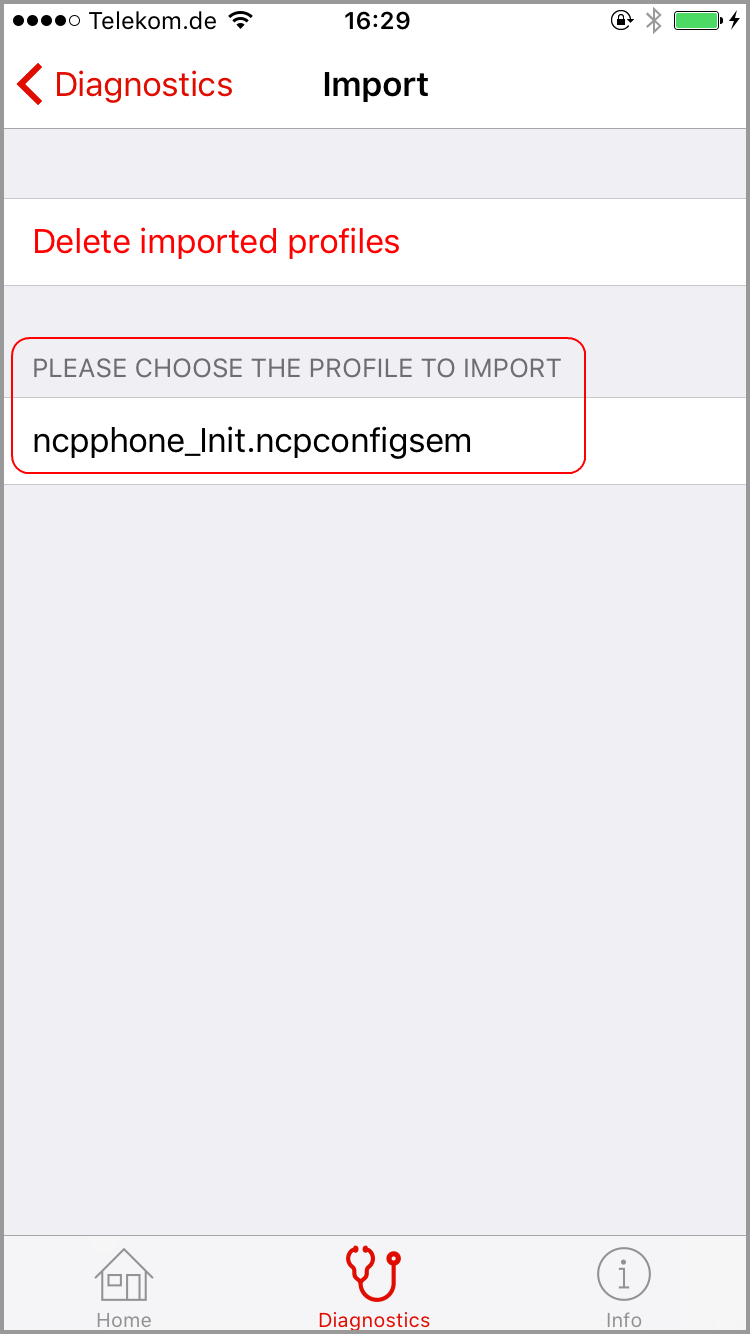
Switch to the configuration import page in the NCP Client App under the Diagnostics tab. Once the configuration has been transferred, import it by selecting it from the displayed list (see figure below).
In the following screens, adding vpn configurations must be permitted and confirmed with a fingerprint or PIN entry. If a certificate is used, enter the certificate PIN when prompted to import the certificate into the key chain.
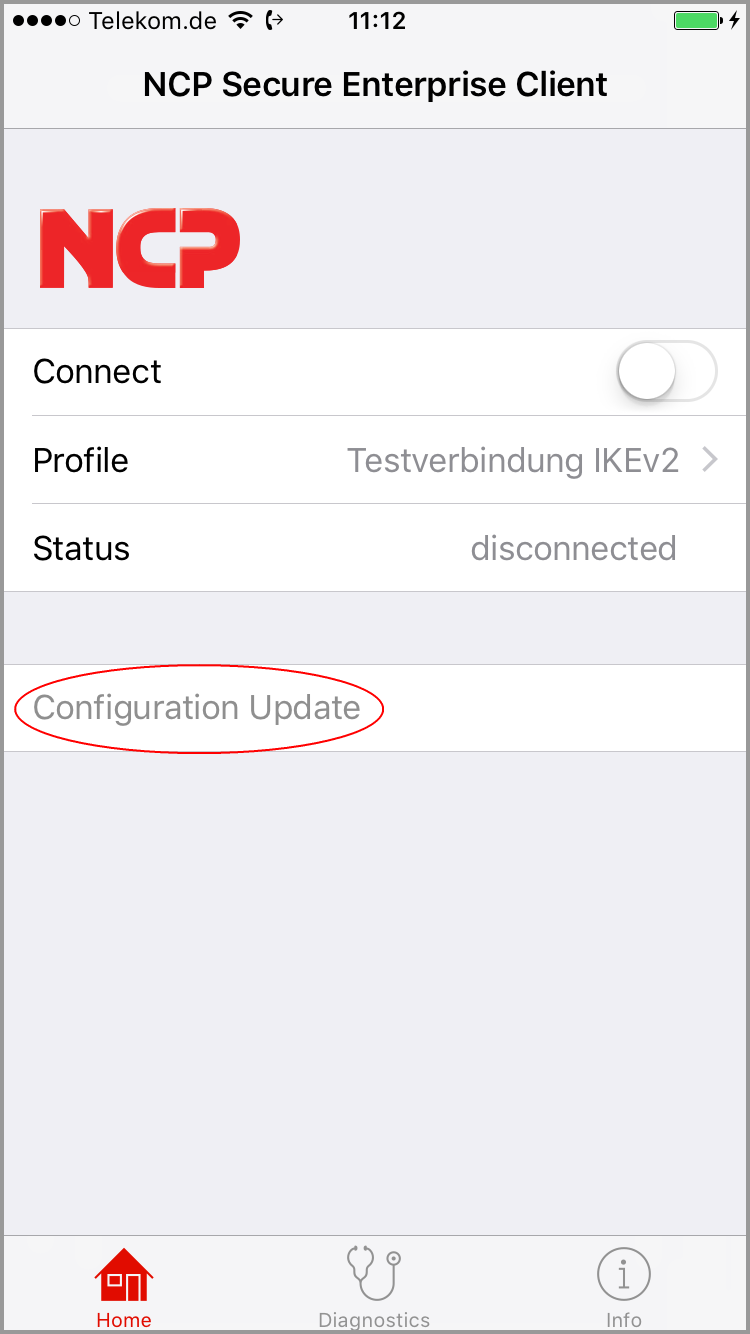
Downloading the personal configuration
After the client has finished importing the initial configuration, you can connect to NCP Secure Enterprise VPN Server manually to download a personal profile via NCP Secure Enterprise Management.
To do this, touch the “Configuration update” link while the client is connected to the NCP Secure Enterprise VPN Server (see figure below).
Now you can enter the log-in details which you have received from your administrator in a separate message (for example via e-mail). This is usually the authentication code and VPN username (User ID).
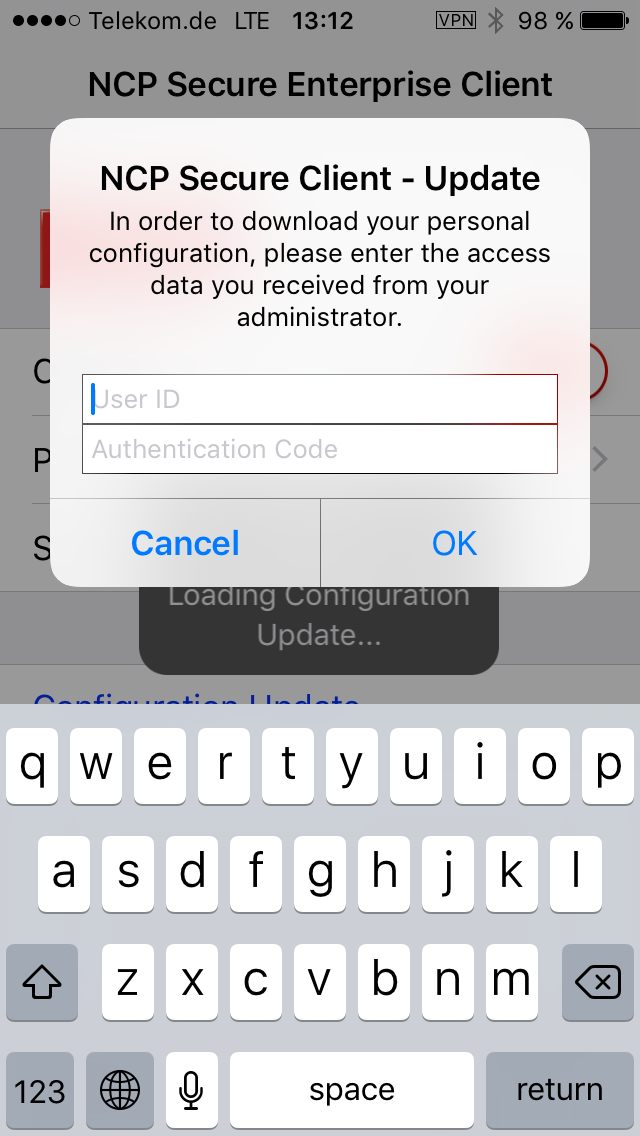
After successful input, the personal configuration is downloaded and the import process is started automatically.
In the following screens, adding vpn configurations must be permitted and confirmed with a fingerprint or PIN entry. If a certificate is used, enter the certificate PIN when prompted to import the certificate into the key chain.
After making the first connection, the initial installation within the scope of the rollout is complete. When the next connection is established, the personal profile can be used to establish the connection to the company network via the VPN tunnel.
If authentication via touch ID is configured in the NCP Secure Enterprise Management user profile, this method of authentication may be required to establish the next connection.
© 2017 NCP engineering GmbH